Most people don’t wake up thinking about orthodontics. But if you’ve ever glanced at your reflection or a picture of your smile and wished it looked a bit straighter, you may have wondered what fixing it would actually involve.
Modern clear aligners have removed much of the hassle of undergoing traditional metal braces treatment. The process is surprisingly simple and straightforward. In this guide, you’ll learn:
- About the convenience of digital scanning
- What happens when you get clear aligners
- The details of wearing aligners
- When you can expect to see visible smile changes
- How to take the next step
Step 1: Consultation and 3-D Scan
You’ll start by undergoing a thorough examination. One of our experienced dentists will evaluate whether you’re a good candidate for the SureSmile clear aligner treatment. This system works well for older teens and adults dealing with mild to moderate issues like:
- Crowded teeth
- Gaps
- Misaligned teeth
- Overbites
- Underbites
- Crossbites
- Open bites
More complex issues may require the use of traditional braces treatment. At Dentistry @ University Pointe, we offer comprehensive orthodontic services, including traditional braces.
After your examination, our dental team will use digital scanning technology to get impressions of your teeth. You won’t have to experience the joy of goopy impression trays. One of our dental assistants will use a small wand to capture thousands of images of your teeth within minutes to create a precise 3-D model of your mouth, ensuring that your aligners fit snugly.
Our dentists will show you the 3-D model of your mouth during your visit. You’ll even get a preview of your new smile before receiving your aligners.
Step 2: Custom Treatment Plan
Once your scan is complete, one of our dentists will map out the entire aligner process, plotting out how your teeth move over time. Your treatment plan is built specifically for your tooth anatomy, goals, and factors like your age. We’ll use computer software to virtually position your teeth into their ideal spots, then determine how many aligners you’ll need to slowly shift your teeth to the optimal location.
Advanced Digital Planning and Precision Mapping
Computer software allows our dentists to create a plan that ensures your teeth move efficiently and safety. It accounts for the root position, along with the visible crowns. Some teeth need to move before others can shift. This is called sequential tooth movement.
Our dentists will take the time to fine-tune your plan, adjusting your tooth’s movements carefully through the sequence of aligners you’ll wear. Before your aligners are made, you’ll review the plan together.
Step 3: Aligner Fabrication
After your custom plan is completed, we’ll send it to SureSmile manufacturers, who will create your aligners using medical-grade material engineered for orthodontic treatment. Each aligner in your series is slightly different from the one before it, representing the next step in your progression.
Once your aligners arrive, our dental team will ensure that your aligners fit smoothly and comfortably in your mouth and provide you with detailed instructions about how to wear them.
Step 4: Wearing and Changing Your Aligners
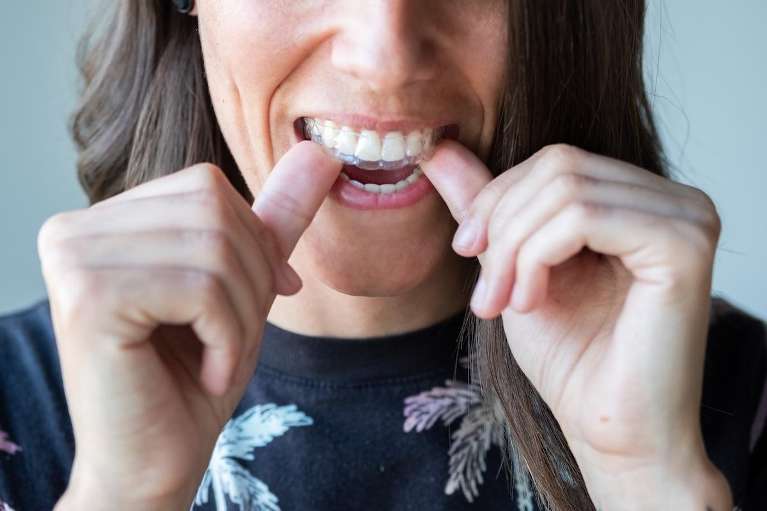
Once you have your SureSmile aligners in hand, you’ll wear them 20-22 hours every day. You can remove them to eat, drink anything other than water, and when you brush or floss your teeth. Otherwise, they stay in your mouth!
You’ll wear each set of aligners for a week or two, depending on your plan. When it’s time to switch, you simply move to the next aligner in the sequence. For the first day or two with a new aligner, you may feel some pressure. This is normal and means that the aligner is working.
Tips for Daily Wear and Compliance
Always keep your aligner case with you. You don’t want to accidentally toss your aligner in the trash because it’s sitting on a napkin when you eat out. Lost aligners are one of the most common treatment delays.
Rinse your aligners when you remove them and brush them gently. You may want to set a phone reminder for the first few weeks until wearing them becomes automatic.
When you eat, brush your teeth before putting your aligners back in. Food particles that get trapped in between your teeth and aligners can lead to tooth decay.
Step 5: Monitoring and Adjustments
You’ll come into our office for regular check-ins with one of our dentists so that we can make sure everything is progressing according to your treatment plan. Typically, your check-in appointments will happen every six to eight weeks and take just a few minutes.
Sometimes everything is going smoothly, and you’ll simply continue with your current series of aligners. In some cases, minor adjustments might be needed if one tooth is moving more slowly than expected, for example. In some cases, making an adjustment to your next series of aligners might be needed.
Step 6: Retainers and Long-Term Results
Once you finish with your last set of aligners, there’s a final step to ensure that your results are long-lasting. Our dentists will provide you with retainers, often similar to your final set of aligners, that you’ll wear at night. The details of this, how long you wear it, and whether you need permanent retainers depend on your specific treatment plan.
The retainer phase of your treatment plan is important, as teeth will often gradually drift back to their original position without ongoing treatment.
Results Timeline: What to Expect Month by Month
Treatment timelines vary depending on where your teeth started. If you have minor crowding, your clear aligner treatment may take six to eight months. More complex cases will likely take longer. You may start seeing visible changes around the three-month mark.
In the first month, you’ll be adjusting to your new routine, and you probably won’t notice any visible changes. During months two through four, you’ll likely start to see noticeable progress.
During the middle and final phases, months five through nine, you’ll really start to see dramatic differences. This might include your tooth gaps closing and/or your crooked teeth looking straighter. During the final months of treatment, your teeth will be settling into their final positions.
Ready to Book a SureSmile Consultation?
Hopefully, you now have a better understanding of the SureSmile step-by-step process. If you’re considering clear aligners in West Chester or have more questions about clear aligners, the team at Dentistry @ University Pointe is ready to work with you. Consider giving us a call at (513) 772-4000 to schedule your SureSmile consultation today.